The focus of this example is the bproc.loader.load_shapenet(), which can be used to load objects from the ShapeNet dataset.
See the ShapeNet Webpage for downloading the data. We cannot provide the script for downloading the ShapeNet dataset because a user account on the ShapeNet webpage is needed.
Usage
Execute in the BlenderProc main directory:
blenderproc run examples/datasets/shapenet/main.py <PATH_TO_ShapeNetCore.v2> examples/datasets/shapenet/output
examples/datasets/shapenet/main.py: path to the python file with pipeline configuration.<PATH_TO_ShapeNetCore.v2>: path to the downloaded shape net core v2 dataset, get it [here](http://www.shapenet.org/)
examples/datasets/shapenet/output: path to the output directory.
Visualization
In the output folder you will find a series of .hdf5 containers. These can be visualized with the script:
blenderproc vis hdf5 examples/datasets/shapenet/output/*.hdf5
Steps
Set the ShapeNet category as specified with
bproc.loader.load_shapenet().Sample camera poses
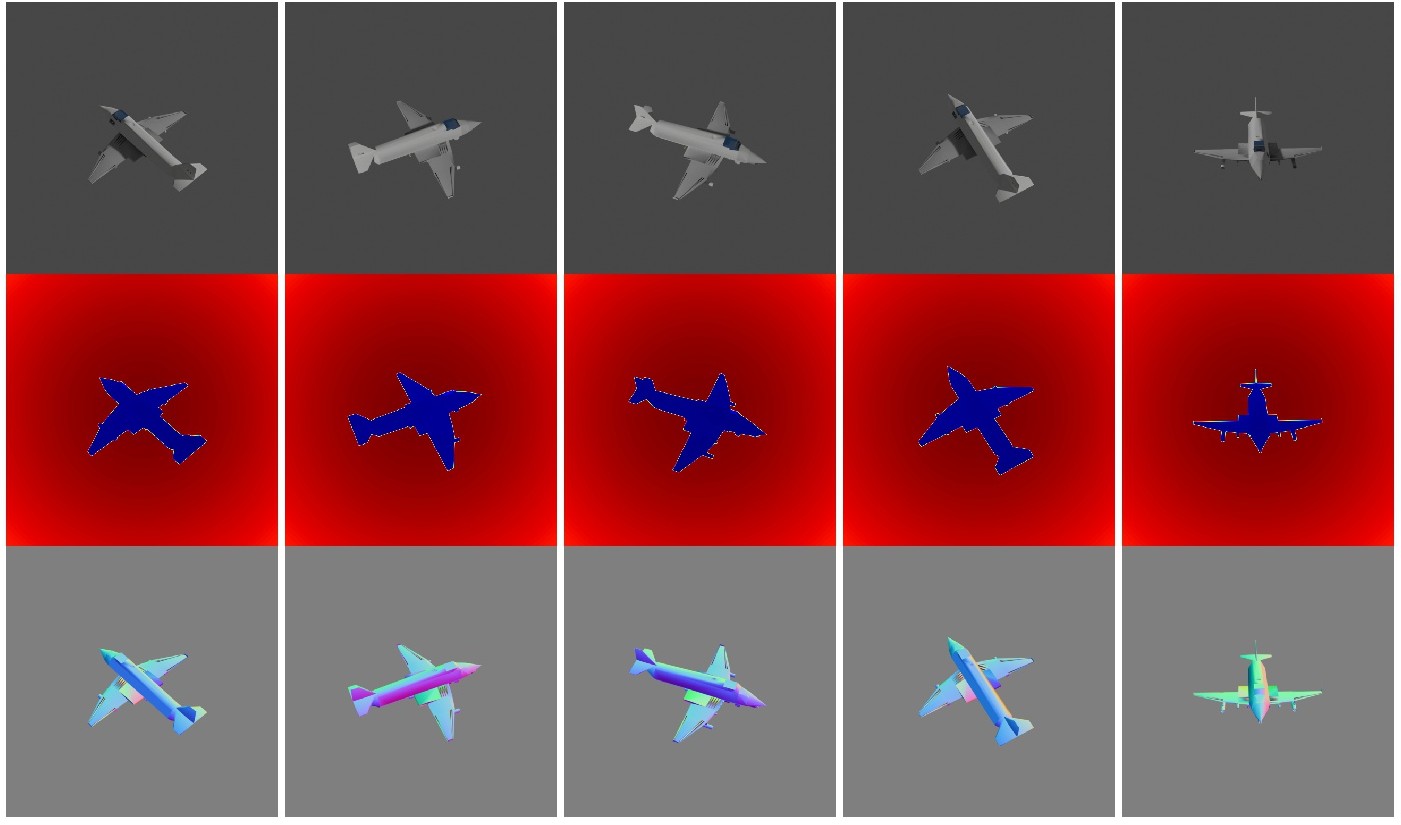
bproc.camera.Render RGB, Depth and Normal images
bproc.renderer.Collect the metadata of the ShapeNet object.
Collect Camera Pose and Instrinsics data.
Write HDF5 file:
bproc.writer.write_hdf5().
Python file (main.py)
Global
bproc.init()
The same as in the basic example.
ShapeNetLoader
shapenet_obj = bproc.loader.load_shapenet(args.shapenet_path, used_synset_id="02691156", used_source_id="10155655850468db78d106ce0a280f87")
This loads a ShapeNet Object, it only needs the path to the
ShapeNetCore.v2folder, which is saved inargs.shapenet_path.The
used_synset_id=02691156is set to the id of an airplane, and theused_source_id=10155655850468db78d106ce0a280f87selects one particular object of that category.The position will be in the center of the scene.
By default, the object center will be moved to the bottom of the bounding box in Z direction and also in the middle of the X and Y plane which makes it easier to place them later on. This does not change the
.locationof the object. To disable this behaviour, set themove_object_originflag toFalse.
CameraSampler
for i in range(5):
    # Sample random camera location around the object
    location = bproc.sampler.sphere([0, 0, 0], radius=2, mode="SURFACE")
    # Compute rotation based on vector going from location towards the location of the ShapeNet object
    rotation_matrix = bproc.camera.rotation_from_forward_vec(shapenet_obj.get_location() - location)
    # Add homog cam pose based on location an rotation
    cam2world_matrix = bproc.math.build_transformation_mat(location, rotation_matrix)
    bproc.camera.add_camera_pose(cam2world_matrix)
We sample here five random camera poses, where the location is on a sphere with a radius of 2 around the object. Each cameras rotation is such that it looks directly at the object and the camera faces upwards in Z direction.
RGB Renderer
# activate normal and depth rendering
bproc.renderer.enable_normals_output()
bproc.renderer.enable_depth_output(activate_antialiasing=False)

# render the whole pipeline
data = bproc.renderer.render()
To render with a transparent background, add bproc.renderer.set_output_format(enable_transparency=True). Depth and Normal images will also be produced.