Stereo Matching with Random Pattern Projector
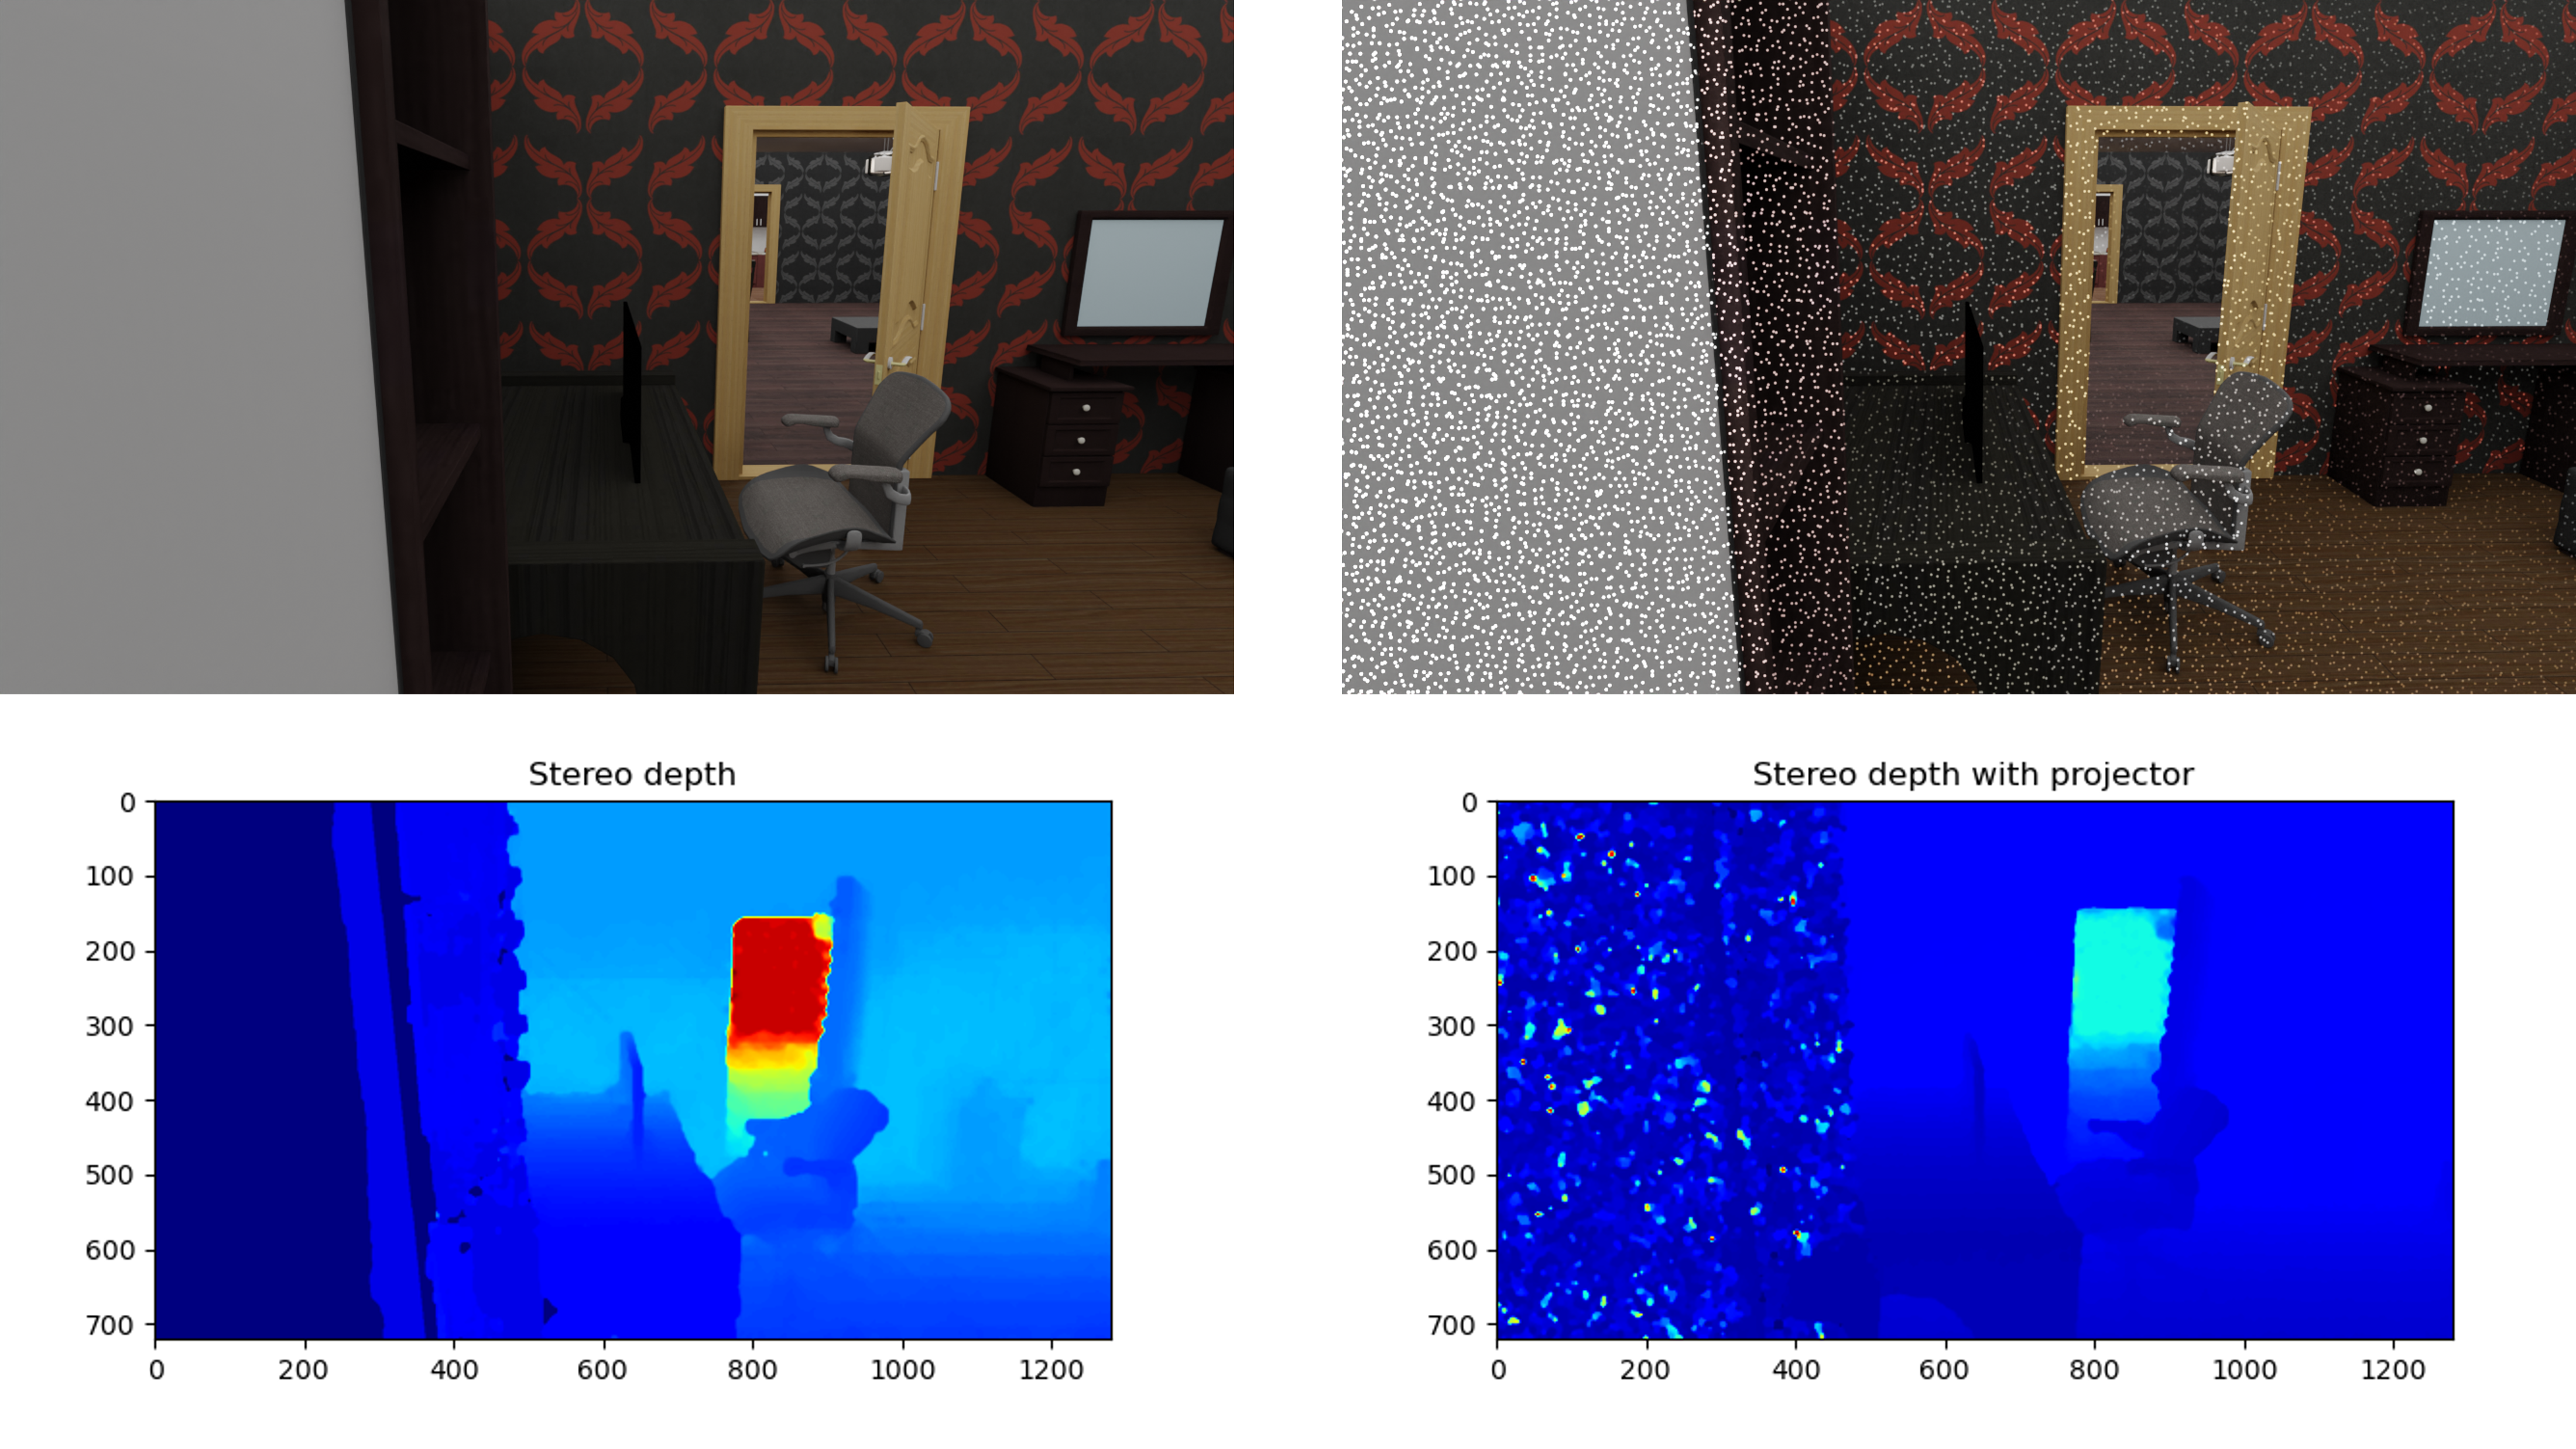
On the left side we can see the rendered RGB image (right) without a pattern and the corresponding stereo depth estimation on the bottom. On the right side we can see the rendered RGB image (right) with a projected random pattern adding 25600 points to the image and the corresponding stereo depth estimation on the bottom. Adding a random pattern to the image increases available features for the stereo matching algorithm, making it easier to discern small details, such as the chair’s arm rest. Furthermore, the added random pattern is projected through a SPOT light source in blender, which loses intensity the further away from the source it gets.
Usage
Execute in the BlenderProc main directory:
blenderproc run examples/advanced/stereo_matching_with_projector/main.py <path to cam_pose file> <path to house.json> <number of points> examples/advanced/stereo_matching/output
examples/advanced/stereo_matching_with_projector/main.py: path to the main python file to run.<path to cam_pose file>: Should point to a file which describes one camera pose per line (here the output ofscn2camfrom theSUNCGToolboxcan be used).<path to house.json>: Path to the house.json file of the SUNCG scene you want to render. Which should be either located inside the SUNCG directory, or the SUNCG directory path should be added to the config file.<number of points>: Number of points for random pattern. Default = 2560.examples/advanced/stereo_matching_with_projector/output: path to the output directory.
Visualizaton
Visualize the generated data:
blenderproc vis hdf5 examples/advanced/stereo_matching_with_projector/output/0.hdf5
Implementation
# Genrate pattern image
pattern_img = bproc.utility.generate_random_pattern_img(WIDTH, HEIGHT, args.points)

# Define a new light source and set it as projector
light = bproc.types.Light()
light.set_type('SPOT')
light.set_energy(3000)
fov = bproc.camera.get_fov()
ratio = HEIGHT / WIDTH
light.setup_as_projector(fov[0], ratio, pattern_img)
Here we setup the projector:
Generate a pattern image to be projected onto the scene.
Set new spot light with custom energy.
Using the spot light as projector for specified pattern image
pattern_img:Set projector location to camera via
COPY TRANSFORMSScale image based on field of view
fovof camera and rendered image sizeWIDTH, HEIGHTLink image as texture ..
for further details see implementation at blenderproc/python/types/LightUtility.py
# Enable stereo mode and set baseline
bproc.camera.set_stereo_parameters(interocular_distance=0.05, convergence_mode="PARALLEL")
Here we enable stereo rendering and specify the camera parameters, some notable points are:
Setting the
interocular_distancewhich is the stereo baseline.Specifying
convergence_modeto be"PARALLEL"(i.e. both cameras lie on the same line and are just shifted byinterocular_distance, and are trivially coplanar).Other options are
OFF-AXISwhere the cameras rotate inwards (converge) up to some plane.convergence_distanceis the distance from the cameras to the aforementioned plane they converge to in case ofOFF-AXISconvergence mode. In this case, this parameter is ignored by Blender, but it is added here for clarification.
# Apply stereo matching to each pair of images
data["stereo-depth"], data["disparity"] = bproc.postprocessing.stereo_global_matching(data["colors"], disparity_filter=False)
Here we apply the stereo matching.
It is based on OpenCV’s implementation of stereo semi global matching.
Its pipeline runs as follows:
Compute the disparity map between the two images. After specifying the required parameters.
Optional use of a disparity filter (namely
wls_filter). Enabled by settingdisparity_filter(Enabling it could possibly lead to less accurate depth values. One should experiment with this parameter).Triangulate the depth values using the focal length and disparity.
Clip the depth map from 0 to
depth_max, where this value is retrieved fromrenderer.Renderer.Apply an optional depth completion routine, based on simple image processing techniques. This is enabled by setting
depth_completion.
There are some stereo semi global matching parameters that can be tuned (see fct docs), such as:
window_sizenum_disparitiesmin_disparity