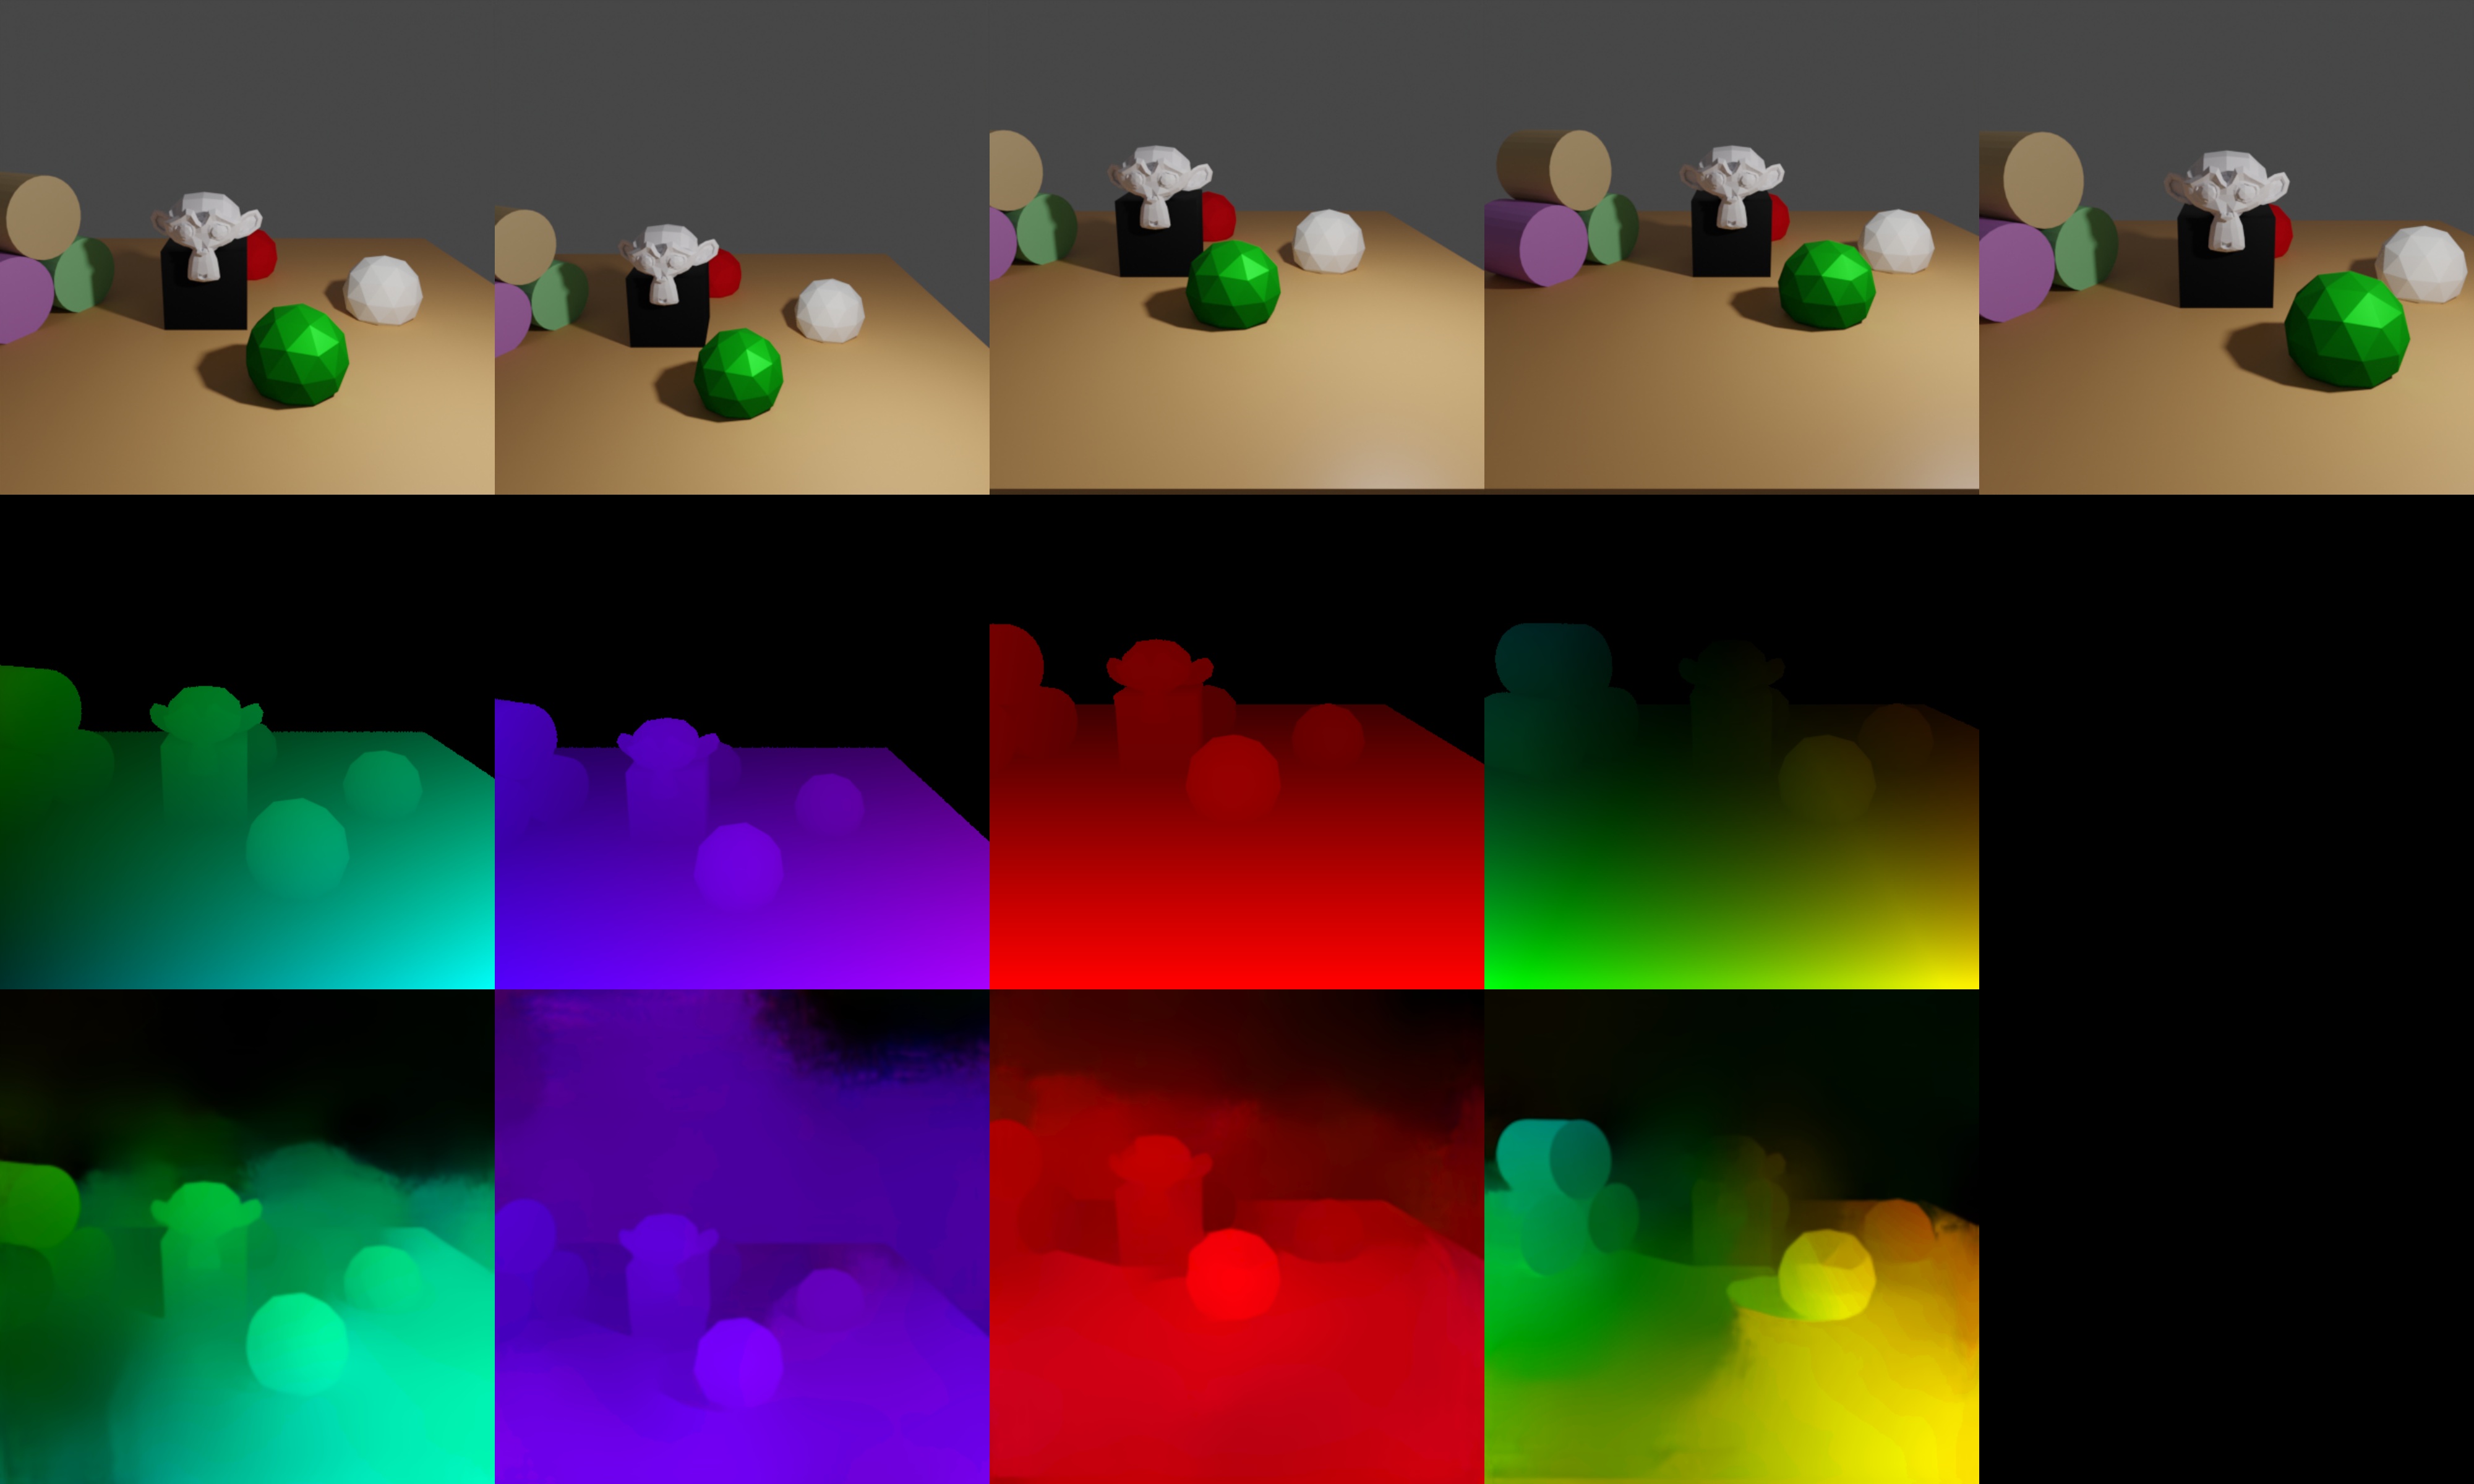
Optical Flow

First row: RGB images, second row: forward optical flow generated by Blender, third row: forward optical flow from a pretrained `LiteFlowNet <http://mmlab.ie.cuhk.edu.hk/projects/LiteFlowNet/>`_ as comparison
In this example we demonstrate how to obtain forward / backward flow values between consecutive key frames.
Flow is visible if either the camera or objects move between frames. Here, the camera undergoes the following motion:
0 -10 4 1.3 0 0  # initial position
0 -12 4 1.3 0 0  # moving away from object
2 -12 4 1.3 0 0  # moving to the right
2 -12 6 1.3 0 0  # moving upwards
1 -11 5 1.3 0 0  # combined motion (to the left, towards object and downwards)
Usage
Execute in the BlenderProc main directory:
blenderproc run examples/advanced/optical_flow/main.py examples/advanced/optical_flow/camera_positions examples/resources/scene.obj examples/advanced/optical_flow/output
examples/advanced/optical_flow/main.py: path to the main python file to run.examples/advanced/optical_flow/camera_positions: text file with parameters of camera positions.examples/resources/scene.obj: path to the object file with the basic scene.examples/advanced/optical_flow/output: path to the output directory.
Visualization
Visualize the generated data:
blenderproc vis hdf5 examples/advanced/optical_flow/output/1.hdf5
Implementation
# Render the optical flow (forward and backward) for all frames
bproc.renderer.render_optical_flow(get_backward_flow=True,
                                   get_forward_flow=True,
                                   blender_image_coordinate_style=False)
Go through all cam poses and renders forward and / or backward flow
The images are rendered using the
.exrformat which allows linear colorspace and higher precision, and then converted to numpy.float32 arraysPer default, Blender uses the bottom left corner as coordinate system origin. OpenCV and popular Flow datasets use the upper left corner instead - change the flag
"blender_image_coordinate_style": Trueif you want the default Blender behaviour. Note that the colors in the visualization will be different!